How to delete drives with a single USB stick?
Yes, you read it right, such magic is possible! You can create a bootable drive that can run Active@ KillDisk at the startup without the need for the use of a mouse & keyboard or even a monitor. However, when using unknown incantations to conjure somewhat unfamiliar events some things can always go wrong if the user is not careful, hence this article.
To perform the deletion of all the drives on the respected computer you will need a USB stick and Active@ Boot Disk or Active@ KillDisk Professional or Ultimate. You will need to launch Boot Disk Creator and add two files to it before creating a bootable drive. Most of the time you can write by yourself a small batch file that will enable you to delete all drives automatically without deleting the drive that you used to boot the computer. For example (-ea) for ‘erase all’ and (-xr) ‘exclude removable drives’. However, some removable drives report themselves as being ‘fixed disks’ so not only that this command will not work on them but will likely render your USB drive erased. So to avoid such nuisances we wrote two types of batches each for the versions of Boot Disk operating systems that we have (or had) in our offer.
If you have a newer (x64 bit version) of Active@ Boot Disk please use this zip file
Download LaunchKilldisk64.zip (64-bit)
However, if you are on an older 32-bit Active@ Boot Disk please use this zip file:
Download LaunchKilldisk.zip (32-bit)
WARNING: BE VERY CAREFUL WHEN DOING THIS!
Creating an executable bootable drive
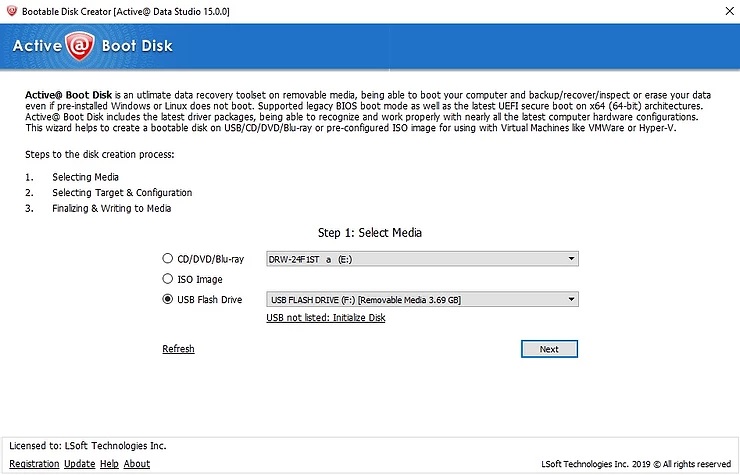
Run Boot Disk Creator and choose the USB drive where you want to install the Boot Disk and click Next.
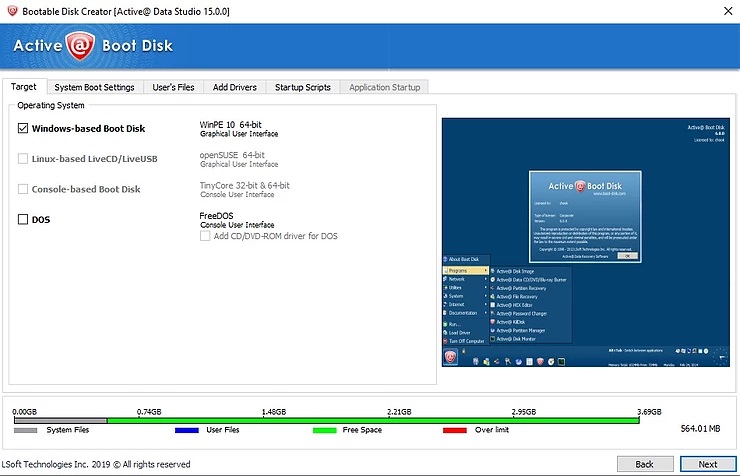
Choose ‘Windows-based Boot Disk’, do not click Next since there are more settings that we need to set plus to add those files that we previously mentioned.
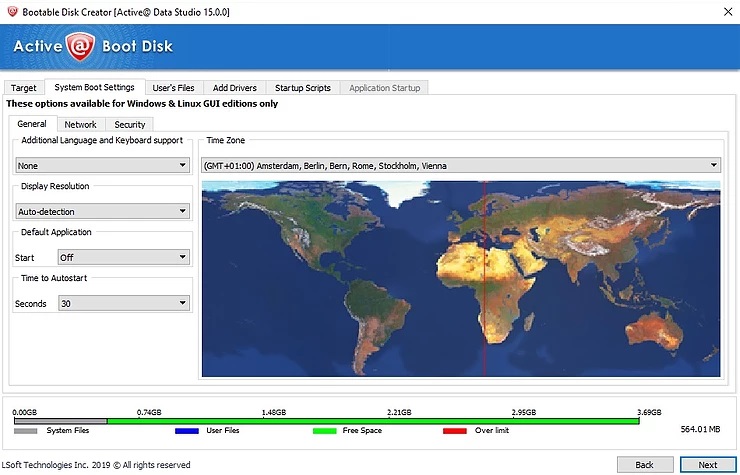
Click on ‘System Boot Settings’ tab and make sure that ‘Default Start Application’ is set to Off.
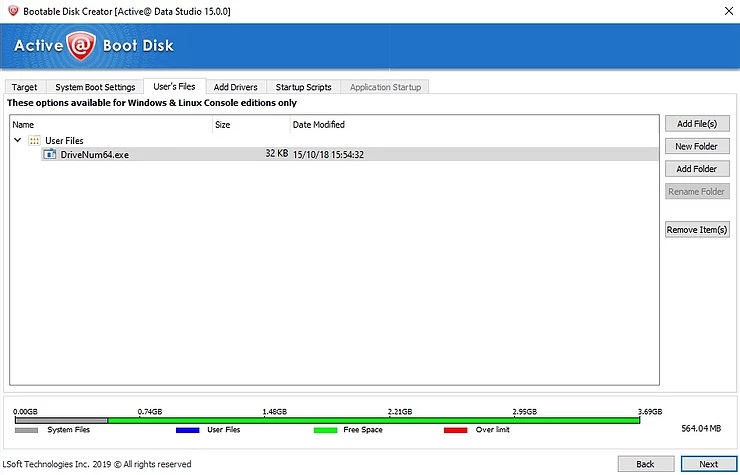
Click on the next ‘User's files' tab and add DriveNum64.exe. If you are on the 32-bit version add DriveNum.exe from the 32-bit zip file
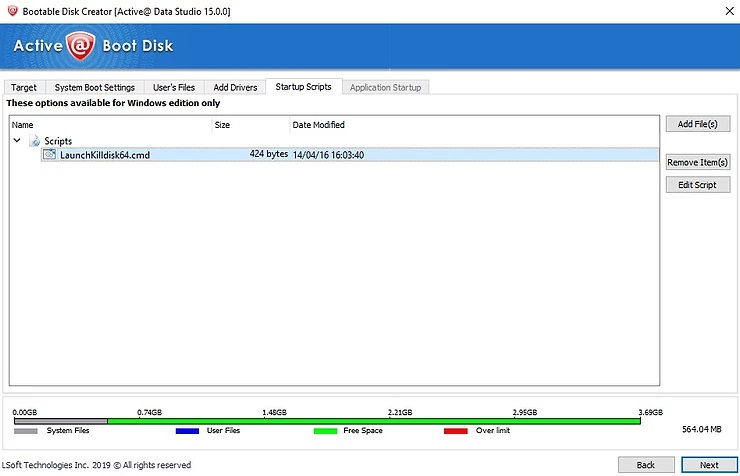
Next click ‘Startup scripts’ tab and add LaunchKilldisk64.cmd bat file. For 32-bit version add LaunchKilldisk.cmd. Click Next and in the next window click Create.
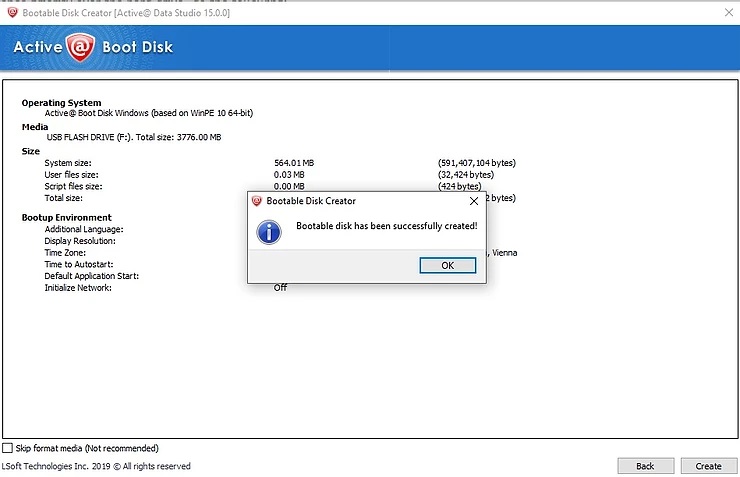
Bootable Disk Creator will prompt you to confirm the decision to format your USB and install Boot Disk. And after a few minutes you should see this on your screen. Congrats, you got yourself a fully automated data sanitation Boot Disk!
All you need to do next is is to plug the USB stick into the computer that has all of the drives that you want to delete, boot it (make sure that boot settings in BIOS are set for USB) and KillDisk will automatically delete all of the drives without any additional actions required.
This method of data sanitation is very useful for technicians who just want to have lots of drives and PCs on their hands but do not want to waste time going through all the hoops that are required when using KillDisk.
Software used in the article: