How to wipe a drive in Windows 10 or Windows 11
Over the years, large amounts of files have been stored and later deleted on computer drives. This leaves data integrity vulnerable since a significant amount of data is available for recovery. Modern SSD drives have a TRIM function that enables automatic data wiping after a certain period. However, since HDDs use older technology TRIM function is not available in this case. Therefore, additional steps need to be taken to delete data permanently.
Active@ KillDisk Disk Erasure
In case of Active@ KillDisk Freeware, download the file from this link and install the software.
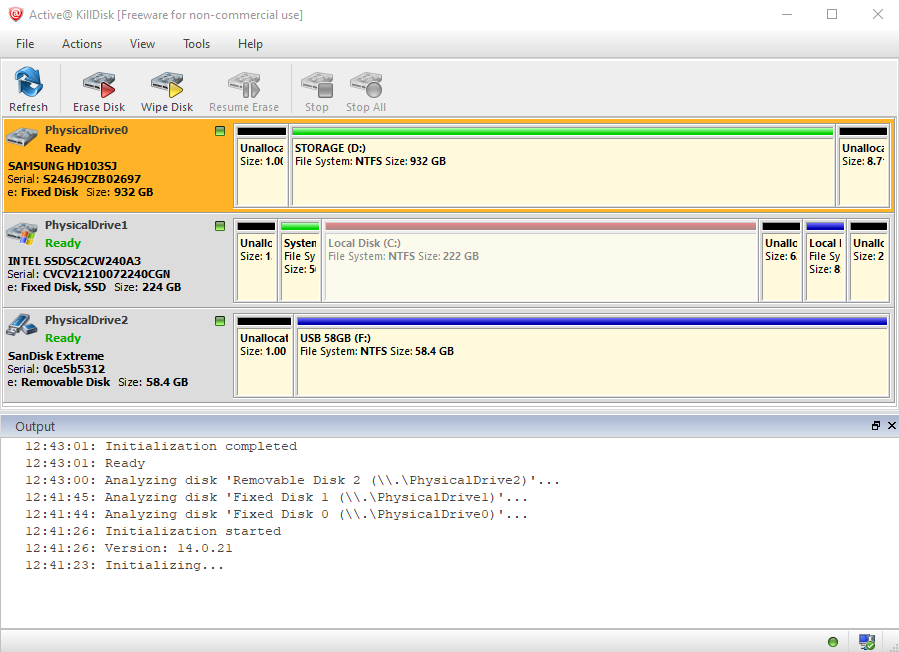
Upon the installation, run it and select the hard disk drive would you like to erase
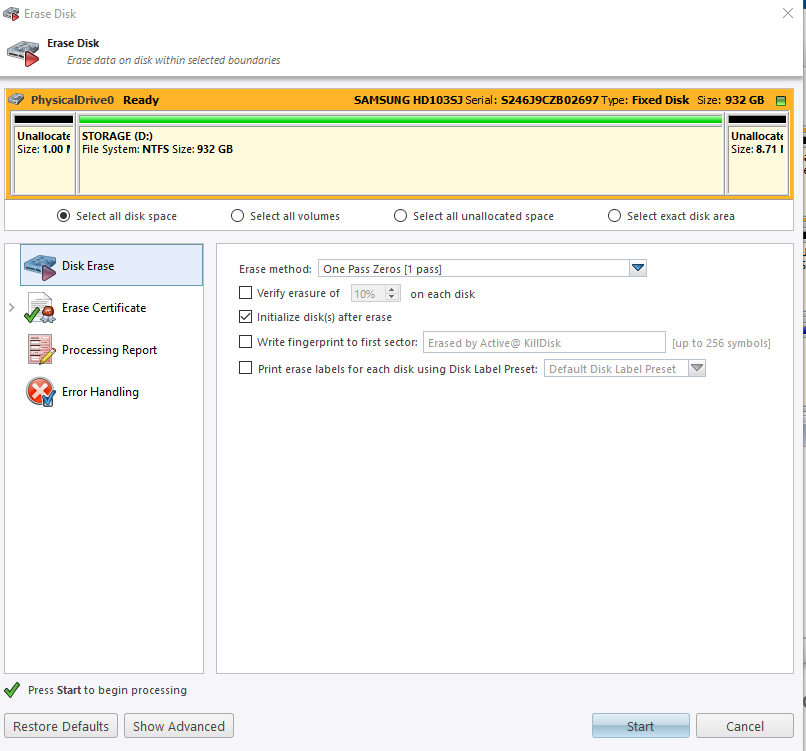
Click on Erase Disk, which will enable another menu. Active@ KillDisk Freeware comes with a One Pass Zero method. The whole drive will be overwritten with zeros in one swoop.
For other advanced sanitation methods, a professional license is required. Click on the Start button, enter ERASE-ALL-DATA in the confirmation window, and the erasure process begins.
The duration of the erasure can vary depending on the size and the speed of the drive.
Windows 10/11 Disk Erasure
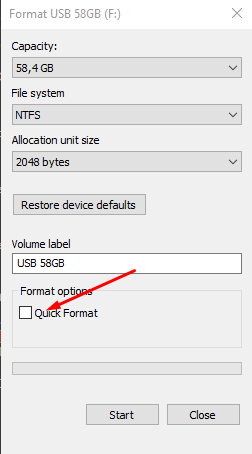
As it is well known, Windows OS already has a built option for deleting drives called Format. Right-click on the drive you want to erase and select Format to access it. However, to use the best possible choice for deleting a drive, it is required to uncheck the Quick Format box and click Start. According to Microsoft, zeroes will be written across the whole drive.
Disk Wipe
If you have deleted files but want to delete them permanently without deleting the whole drive, then wiping the disk is what you need to do. As in the earlier example, we will be using Active@ KillDisk and Windows’ in-built option.
Disk Wipe with Active@ KillDisk
As in the previous example, select the drive which free space you want to wipe. Click on Wipe Disk and press the Start button. As in the last example, the erase method is One Pass Zero. A professional version of Active@ KillDisk is required to use sanitation methods with multiple passes.

Disk Wipe with Windows
To access the Disk Wipe function, you should be comfortable using Windows PowerShell. Right-click the Windows button and click on Windows PowerShell (Admin), and the Windows PowerShell window will appear.
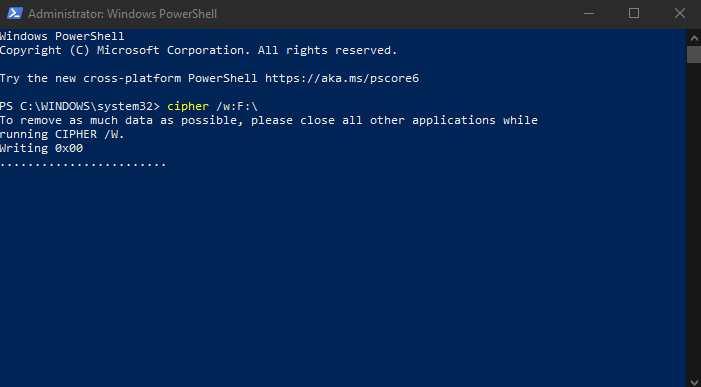
To run the wipe command for the F: drive, insert this code:
cipher /w:F:\
Likewise, to wipe the D: drive, insert this code:
cipher /w:D:\
Of course, depending on the speed of your drive and the amount of free space needed to be overwritten, your mileage might vary.
Conclusion
Given the amount of data we interact with on a daily basis, which out scales several orders of magnitude the amount we used to come across just a decade ago, securely wiping and erasing them is a must in the current age. Today, when privacy is, as it should be, one of the most important topics in the modern world securely erasing and wiping data, is a simple must. Why let prying eyes get a hold of your data when it is completely avoidable? As the old saying goes: Better be safe than sorry.
Windows 10 and Windows 11 have their own ways of deleting data, although for some of them some technical knowledge is required.
But if you want an easy way of data disposal Active@ KillDisk Freeware can do the job just as Windows if not better without any technical knowledge required from the user.
With Active@ KillDisk Professional, apart from gaining access to multiple different ways of deleting data, you also get sanitation certificates, email notifications, and much, much more.